The official downloaded version of Windows 10/11 ISO has an install.esd file that includes all Windows editions but MDT needs a more specific edition of install.wim copy to work with. So, here are the steps to prepare a copy of the Windows image for MDT deployment.
1. Download Windows 10/11 ISO image
Download and run the Windows 10 Media Creation Tool to create the installation media in ISO format.

2. Extract files
Right-click the ISO file we just downloaded, and choose Mount to mount the image into a local drive.

Now let’s make a copy of the mounted drive to a folder. For me, I copied the whole drive into a Software folder on my computer.
3. Create install.wim from install.esd
Open an elevated Command Prompt window and run the DISM command to locate the right image to convert first.
DISM /Get-WimInfo /WimFile:sources\install.esd

Since I am preparing for the Pro version, index 6 is what I needed. Now run the following to create the install.wim file.
DISM /Export-Image /SourceImageFile:sources\install.esd /SourceIndex:6 /DestinationImageFile:sources\install.wim /compress:max /CheckIntegrity
This created the install.wim file in the same folder as install.esd.

4. MDT Setup 1 – Add Image
Now let’s open Deployment Workbench (MDT Console), right-click Operating System and choose Import Operating System.

Select the entire image folder that contains the install.wim file we just managed to create. Check the Move the files option if needed.
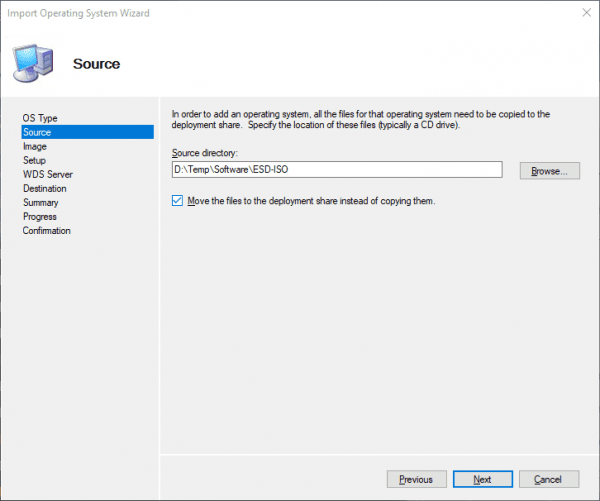
Given a unique name for the image, and done for the import.
That’s it. Now you can either create a new task sequence that uses the newly created image or modify an existing one.
Brilliant, worked like a charm!
Much appreciate
Hi,
it seems to work, but when i add the source i got this error:
“The source directory specified does not contain an identifiable operating system.”
I took the 21H2 Version from the Microsoft Mediacreation Tool, just as shown.
Any ideas?
Thanks!!
Hello, I have the same problem ! 😮
Thanks
The key is to create the right version of install.win through step 1 to 3. You may check to make sure the created version is copied back to the folder you will be selecting later on.
Thank you, you are right!